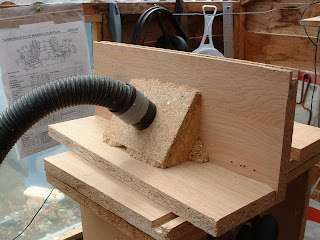
I bought a router after spending far too long making some simple lap joints for a cupboard door. It was a revelation. I could make smooth perfect cuts with ease. To keep things neat and tidy I fitted the shop vac pipe to the cowl that came with the unit. This wasn't a straight forward fit as BOTH the vac pipe and the cowl outlet were the same size. Luckily a small length of plastic drainage pipe fitted inside both pipes and, with a little duct tape we were in business.
After getting the vac pipe caught up on the edge of the bench, making me jerk around and lousing up a few cuts it was time for a little more improvisation. With the aid of some stout rubber bands looped around the pipe and the other end hooked on a nail in a roof beam, I had a safe and clean working router.
After stumbling around the internet and reading a few books from the library I decided to knock up my own router table. I used MDF and laminated chip board as that was what was lying around in the shed. The first problem was cutting a large hole in the base of the chip board for the router to screw into. There is a plastic base which is held into the base plate by 5 plastic screws. I used this as a template to cut the recess for the router to sit in. But the screws that held the plate were too short to hold the router upside down. To clear this little hurdle I got some small bolts, cut them down to size and made small recess holes in the top to allow them to be suck out of the way of passing work pieces.
I didn't think this would be capable of supporting the whole of the router, plus I wanted a method of raising and lowering the router slowly and accurately. I've seen and heard of many methods, car jacks, wood cogs, but my low tech solution was two blocks of wood with a 45ish degree angle cut between them. A long slit was cut in one block into which a long bolt was passed through into a nut at the rear. As the bolt is turned it closes the blocks together which raises the router, screwing out the bolt lowers the router. When you do this you have to remember to take the brake lever off! Also in the picture you can see the Velcro strap used to keep the power switch in the ON position. You MUST be really careful with this method of control. I switch the router on or off from the switched power socket and to be extra safe, If my fingers have to go anywhere near the bit or the shaft the power is un-plugged and the strap slipped off.
I took my time to make a fence which was bang on 90 degrees, you must do the same if you want work to come out square and true, time spent on this is well worth the time saved correcting miss-cut work. It also has an air box on the back to suck out debris when cutting. The original fence had a hole way to big and ment to much floating around when passing work over the face, and it wasn't square.
It is a continual learning curve using a router table, and one is always wary of the dangers of dealing with a carbide tip spinning at 4000rpm. I pick up tips here and there and intend to pass them on here, so why not follow me on Twitter or bookmark me here and pop back once in a while.
Here's one tip I picked up. Clamp a rule to the left side of a fence, feeding in from the right gives a nice square edge, just right for box making, but that's another ramble.


No comments:
Post a Comment
If you have any views or comments, leave them below.